Have you ever felt overwhelmed by the sheer possibilities of music production software? It can be daunting to choose the right tool, especially when you’re just starting out or even when you’re looking to master your craft. Fortunately, the world of digital audio workstations (DAWs) offers options that cater to both beginners and seasoned professionals. One of those options is Cockos Reaper, a highly flexible and affordable DAW that has won the hearts of many music producers.
Understanding Cockos Reaper
Cockos Reaper is a digital audio workstation that supports recording, editing, mixing, and processing audio and MIDI. It’s designed for efficiency and versatility, allowing you to tailor your workflow to meet your unique needs. With Reaper, you can produce high-quality music without breaking the bank. It’s particularly attractive because of its rich feature set, lightweight footprint, and generous evaluation policy.
Why Choose Reaper?
You might wonder what sets Reaper apart from other DAWs on the market. Here are a few reasons:
- Affordability: Reaper offers a free trial version, and even the full version is significantly cheaper than many competitors.
- Customizability: From interface layouts to keyboard shortcuts, you have control over how Reaper operates.
- Cross-Platform Support: Whether you’re a Windows or macOS user, Reaper runs smoothly on both operating systems.
- Active Community: The user base of Reaper is both active and supportive. You’ll find forums, tutorials, and resources to help you along the way.
Getting Started with Reaper
Now that you might be intrigued, let’s discuss how to get started with Cockos Reaper.
Downloading and Installing Reaper
First things first – you need to download and install the software:
- Visit the official Cockos Reaper website.
- Choose between the Windows or macOS version that suits your system.
- Run the installer and follow the prompts to complete the installation.
Once it’s installed, you can launch Reaper and begin setting it up for your projects.
Setting Up Your Workspace
When you first open Reaper, you’ll see a blank project. Before you jump into making music, take a moment to set up your workspace:
- Track Layouts: You can add tracks by right-clicking in the track area and selecting “Insert New Track.”
- Interface Customization: Adjust the layout by going to Options > Preferences and navigating through the settings to find what works best for you. You can resize tracks, customize colors, and more.
- Toolbar Customization: Right-click on the toolbar to show or hide various tools according to your preferences.
This image is property of www.reaper.fm.
Navigating Reaper’s Interface
Understanding the layout and functionality of Reaper’s interface will make your music production process much smoother.
The Main Window
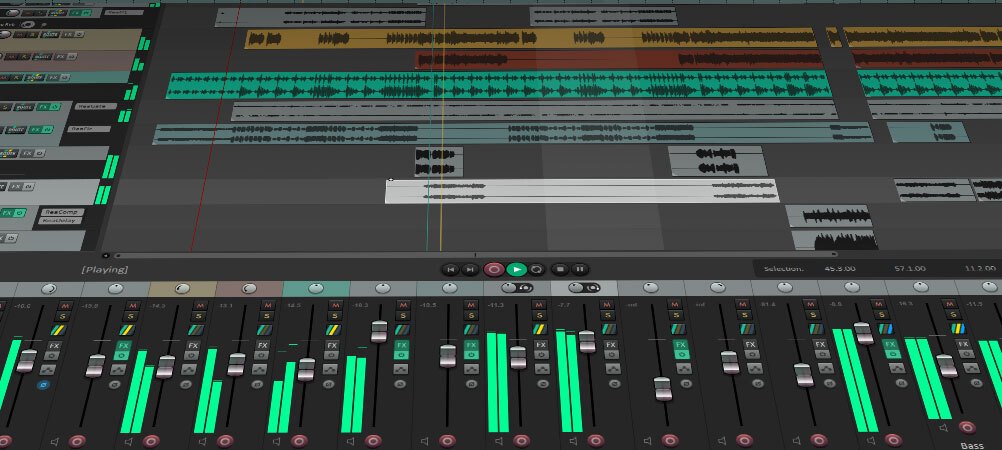
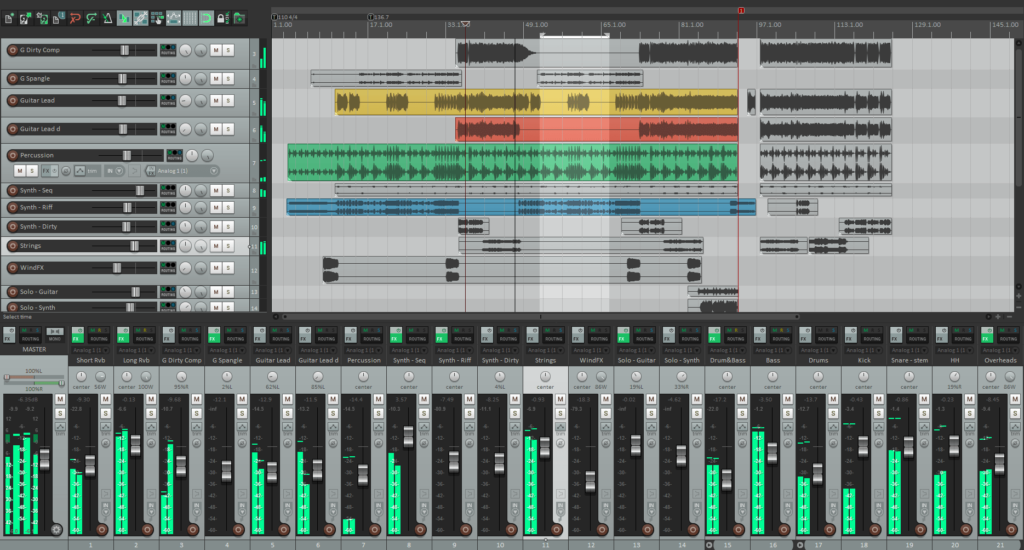
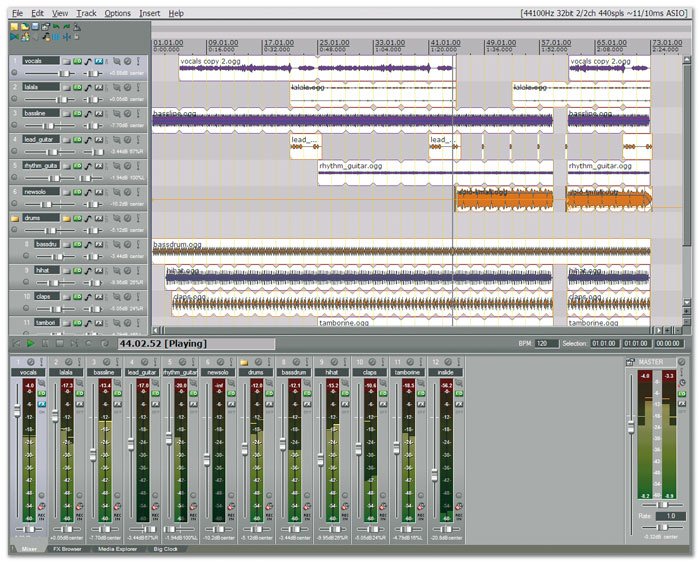
The main window consists of several important sections:
- Track List: This is where you manage all your audio and MIDI tracks. Each track can have its own effects, routing, and automation.
- Transport Controls: These controls allow you to play, stop, record, and navigate through your project.
- Mixer View: You can toggle the mixer view to manage levels, panning, and effects for each track.
Common Functions
Here are some common functions you’ll likely use regularly:
| Function | Shortcut |
|---|---|
| Play | Space Bar |
| Stop | Space Bar (stop) |
| Record | R |
| Undo | Ctrl + Z |
| Redo | Ctrl + Shift + Z |
Getting familiar with these shortcuts will speed up your workflow significantly.
Recording in Reaper
You’re ready to get into the fun part: recording! Whether you’re capturing vocals, instruments, or MIDI, Reaper makes the process simple.
Audio Recording
To record audio, follow these steps:
- Select Your Track: Click on the track you want to record onto.
- Input Settings: Ensure your audio interface is correctly set up by going to File > Preferences > Audio > Device. Select your audio input.
- Arm the Track: Click the ‘Record Arm’ button on your track. This enables that track for recording.
- Set Levels: Speak or play into your microphone and check the levels to make sure they’re peaking appropriately; you want them to sit comfortably below 0 dB.
- Hit Record: When you’re ready, press the record button in the transport controls.
MIDI Recording
MIDI recording is just as straightforward:
- Add a Virtual Instrument: Insert a virtual instrument track by going to Track > Insert Virtual Instrument on New Track.
- Select MIDI Input: Make sure your MIDI controller is connected and active.
- Arm the Track: As with audio, arm your track for recording.
- Record: Hit the record button and start playing!
This image is property of jeffkaiser.com.
Editing in Reaper
After you’ve recorded your tracks, you’ll want to edit them to polish your sound.
Basic Editing Techniques
Here are a few basic editing techniques you can use:
- Cutting and Trimming: Use the “Split” function (S key) to cut your clips into sections. You can also drag the edges of clips to trim them.
- Moving Clips: Click and drag a clip to reposition it within your project.
- Copying and Pasting: You can easily copy (Ctrl + C) and paste (Ctrl + V) clips to duplicate sections of your music.
Effects and Processing
Reaper comes with several built-in effects and allows you to add third-party plugins. Here’s how to add effects:
- Select Your Track: Click on the track you wish to modify.
- Open FX Window: Click on the ‘FX’ button to open the effects window.
- Add Effects: You can choose from various built-in effects or add VST plugins you’ve installed.
The effects you may consider include:
| Effect Type | Purpose |
|---|---|
| EQ | Shape the tonal balance |
| Compression | Control dynamics |
| Reverb | Add space and ambience |
| Delay | Create rhythmic repetitions |
Mixing in Reaper
Once you have recorded and edited your tracks, the next step is mixing. Mixing balances your audio tracks to create a cohesive sound.
Setting Levels
Start by adjusting the volume levels of each track. Ensure that no tracks are clipping and that the overall mix is balanced.
Panning
Panning allows you to place sounds within the stereo field. Experiment with placing different instruments left, right, or center to create depth in your mix.
Adding Automation
Automation is a powerful way to adjust settings dynamically over time:
- Enable Automation: Click on the track and select “Show Track Envelopes/Automation.”
- Choose the Parameter: Select which parameter you want to automate (volume, pan, effect parameters).
- Draw Automation: Use the mouse to draw automation curves directly in your track.
This image is property of dt7v1i9vyp3mf.cloudfront.net.
Finalizing Your Mix
After mixing, you’ll want to ensure your project is polished and ready for final output.
Mixing Tips
- Take Breaks: It’s essential to step away from your mix to return with fresh ears.
- Check on Different Speakers: Listen to your mix on various systems (headphones, car stereo, etc.) to ensure it translates well.
- Reference Tracks: Use professionally mixed songs as references for level, EQ, and overall sound.
Mastering Basics
The final step is mastering, where you prepare your track for release.
- Export Your Mix: Go to File > Render to export your final mix.
- Import for Mastering: Open a new project in Reaper and import your exported track.
- Apply Mastering Effects: Use a limiter, EQ, and possibly other effects to enhance the overall sound.
Reaper has tools available to assist in mastering, or you can use dedicated mastering software.
Overcoming Challenges
Many users encounter challenges while using Reaper. Here are some common hurdles and how to overcome them:
Performance Issues
If you experience lag or dropped audio, consider adjusting the audio settings:
- Buffer Size: Go to Preferences > Audio > Buffering and adjust the buffer size. A larger buffer size can smooth playback at the cost of latency.
- Audio Driver Settings: Make sure your audio interface drivers are up-to-date.
Learning Curve
Every DAW has a learning curve, and Reaper is no exception. Embrace the process!
- Utilize Online Tutorials: There are countless tutorials on platforms like YouTube to help you with specific features.
- Join Forums: Engaging with Reaper user communities can provide support and tips from experienced producers.
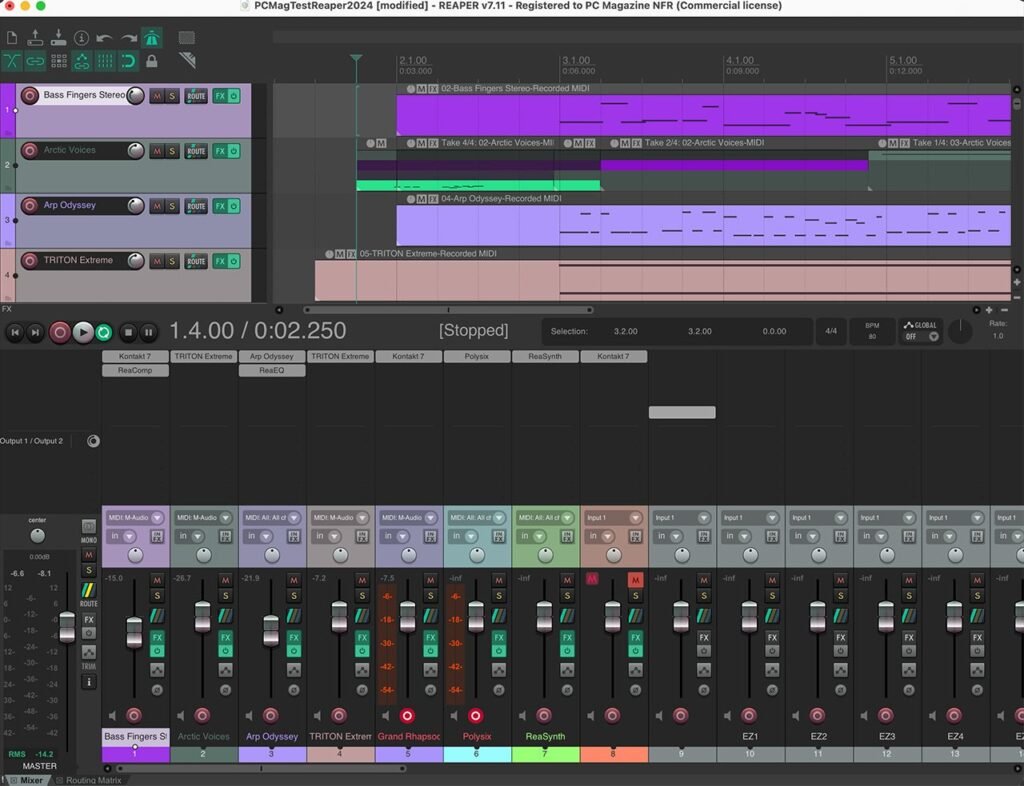
This image is property of i.pcmag.com.
Expanding Your Skills
To truly master music production with Reaper, you should continually seek to improve your skill set.
Experimentation
Don’t hesitate to experiment with different genres, techniques, and tools within Reaper. The more you try, the more you’ll learn.
Continuing Education
Consider taking online courses or workshops focused on specific aspects of music production or using Reaper. Websites like Coursera, Udemy, and Skillshare offer great opportunities.
Conclusion
Mastering music production with Cockos Reaper isn’t just possible; it can be an enjoyable journey. With its rich feature set and supportive community, you have the tools needed to bring your musical ideas to life. Remember, practice makes perfect. Keep experimenting, learning, and refining your skills. You’re on your way to creating music that resonates, and Reaper is right there with you every step of the way. Happy producing!

This image is property of dt7v1i9vyp3mf.cloudfront.net.
